 |
|
|
 |
| |
| Home |
| Glass Tile |
| Glass Tile Information |
| How To Install Glass Tile |
| Glass Tile Photo Gallery |
| Where to Buy Glass Tile |
| Glass Tile Mosaics |
| Glass Tile Links |
GLASS TILE INFORMATION |
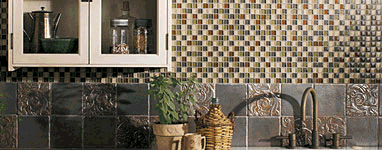
Glass tile is basically glass that is made into various sized tiles and finishes. Glass Tiles are available in different shapes including: Glass Tile Squares, Glass Tile Bricks, Glass Tile Sticks, Glass Tile Ovals, Glass Tile Rounds, and Glass Tile Mixed Sizes. Glass Tiles are available in different finishes, including: Polished Glass Tile, Glossy Glass Tile, Matte Glass Tile, Tumbled Glass Tile, Rippled Glass Tile, and Iridescent Glass Tile. Glass Tiles are available in individual pieces or mounted on a sheet depending in the size of the glass tile and the glass tile manufacturer. Glass Tile is frost resistant making it ideal for exterior applications such as pool, spa, fountain, and barbeque installations. Glass Tile is also stain resistant making it ideal for use as a kitchen back splash, bathroom wall, shower wall, and shower floor installations. How to clean glass tile and glass tile mosaics Normal cleaning of glass mosaic tile can be done with room temperature water and a rag. For a more thorough cleaning and to remove stubborn dirt and stains, use any tile or grout cleaner available at tile dealers or home centers. INSTALLATION: First you need to determine if you are installing loose Glass Tiles or a sheet mounted Glass Tile Mosaic. If you are installing a sheet mounted Glass Tile Mosaic, you need to determine how the individual Glass Tiles are mounted on the Glass Tile Mosaic sheet:
INSTALLING PAPER / CLEAR FILM FACED GLASS TILE MOSAICS With a Paper / Clear Face Mounted Glass Tile Mosaic, the glass tiles are mounted with the paper / clear film on the top face of the Glass Tile Mosaic. IMPORTANT NOTE: Both Paper and Clear Film mounted sheets MUST be installed Paper (or Clear Film) Side UP facing you. INSTALLING NETTING REAR / BACK MOUNTED GLASS TILE MOSAICS With a Netting Rear / Back Mounted Glass Tile Mosaic, the glass tiles are mounted with the netting on the back of the Glass Tile Mosaic and you install the Glass Tile Mosaic with the netting side down.. Glass Tile and Glass Tile Mosaics require the use of a Premium Thinset Mortar to install the Glass Tile and Glass Tile Mosaics with. Setting material products are available through tile dealers, home centers, and major setting material companies. Glass Tile Information does not endorse any particular setting material or setting material manufacturer. Below is a list of products commonly used for installing glass tile. Consult your installer or local tile dealer to determine the most suitable setting material for your particular application. Laticrete: 254 Platinum Multipurpose Thin-Set Mortar. No admixture is necessary just add water. www.laticrete.com Mapei: Kerabond Premium Dry-Set Mortar (Ker 102) mixed with Keralistic Mortar Admix (Ker 310) Mapei: Adesilex P10 (bright white) non sag mortar for glass tile. Mix with water or Keraply. www.mapei.com TEC (H.B. Fuller): Super Flex Premium Performance Universal Latex-Modified Thin-Set Mortar. No admixture is necessary. www.tecspecialty.com Mastic is NOT recommended for installation of glass tile and glass mosaic tile, particularly in wet areas such as showers. Bond strengths are lower than those of recommended setting materials. Mastic does not properly cure when used with impervious materials such as glass and may yellow behind clear or translucent tile. THE FOLLOWING ARE SURFACES THAT ARE ACCEPTABLE FOR INSTALLING GLASS TILE AND GLASS TILE MOSAICS ON TO: Acceptable Surfaces: These surfaces must be properly prepared before installing your Glass Tile and Glass Tile Mosaics. Surface preparation is a key factor in the success or failure of your Glass Tile and Glass Tile Mosaic installation. Although a surface may be listed as acceptable, if it is not properly prepared, loss of bond will occur. Also, all acceptable surfaces may not be acceptable for all applications. Consult manufacturer or installer.
THE FOLLOWING ARE SURFACES THAT ARE NOT ACCEPTABLE FOR INSTALLING GLASS TILE AND GLASS TILE MOSAICS ON TO Unacceptable Surfaces: These surfaces, even if properly prepared, will not provide a bondable or stable surface for your Glass Tile or Glass Tile Mosaic installations. Under no circumstances should Glass Tile or Glass Tile Mosaics be bonded directly to these surfaces:
HOW TO CUT GLASS TILE AND GLASS TILE MOSAICS Small format glass tile (5/8", 3/4", 1") are best cut with specialty glass mosaic tile cutters, available from tile or craft dealers. Tile may also be set on backer board, and then cut to size with a wet saw. The cut edges can be very sharp and should be smoothed with carbide paper or a "white stone" which are also available at tile dealers. HOW TO REMOVE THE PAPER / CLEAR FILM FROM THE FACE OF THE GLASS TILE MOSAIC AFTER IT IS INSALLED Paper Face: Wait for the thinset to bond to the Glass Tile Mosaic. After the thinset has cured and the Glass Tile is securely mounted to the surface, you can Begin wiping down the paper with a damp sponge and warm water. Rub lightly to avoid disturbing the tile placement. The paper facing will begin to darken as the water is absorbed. After 2-3 minutes, test a corner of the paper sheet. Pull lightly downward at an angle instead of straight out. Clear Film Face: Wait for the thinset to bond to the Glass Tile. After the thinset has cured and the Glass Tile is securely mounted to the surface, you can simply peel the clear film away from the glass tile. GROUTING YOUR GLASS TILE AND GLASS TILE MOSAIC Grout is the material used to fill the spaces between the individual Glass Tiles and Glass Tile Mosaics. Grouts are available in many colors. While color is important to the final finished look of the Glass Tile and Glass Tile Mosaic installation, it has little effect on the functionality of the grout. The purpose of grout is, simply, to fill the joints between the Glass Tiles and becomes a permanent, integral component of the finished installation There are basically two different types of Grout you can buy:
Cement Based Grouts Cement Based Grout is basically colored cement and is available in sanded or non sanded depending on the width of your grout joint. If your grout joint is Smaller than 1/8", Non Sanded Grout is generally recommended. If your grout joint is Larger than 1/8", Sanded Grout is generally recommended Most Glass Tile and Glass Tile Mosaic installations use Cement Based Grout. This type of grout is porous and should be sealed after installation to prevent the color from staining. Cement Based Grout should be sealed with a penetrating / impregnating sealer (often called grout sealers) which does not contain silicone, as silicone can shorten the useful life of the sealer. Epoxy Based Grouts Epoxy Based Grouts are chemically cured and are acid and stain resistant making it an excellent choice for use with Glass Tile and Glass Tile Mosaics. Epoxy Based Grouts are becoming more popular because they do not require a sealer and are virtually maintenance free. Below is information on Laticrete SpectraLOCK PRO Epoxy Grout. LATICRETE has answered both consumer and installer expectations on how grout should perform. LATICRETE SpectraLOCK PRO Epoxy Grout is available at Tile Store Online. LATICRETE SpectraLOCK PRO Grout is the finest grout available. LATICRETE SpectraLOCK PRO Grout offers the high performance, color uniformity, durability and stain resistance of an epoxy grout with extraordinary ease of use. The optional LATICRETE SpectraLOCK Dazzle component adds metallic and Glow-in-the-Dark enhancements. Below are some features of LATICRETE SpectraLOCK PRO Epoxy Based Grout:
Uses
Available Colors
HOW TO REMOVE THE GROUT FROM THE SURFACE OF THE GLASS TILE AFTER IT IS DRY. Use a nylon bristle brush, a sponge, and warm water to clean any residue from the tile surface. A hard surface cleaner can be used for more difficult cases. Ideally, the grout should be cleaned to your satisfaction before it has completely cured. A small area should be tested first to make sure the process will not damage or scratch the Glass Tile or Glass Tile Mosaic surface. Note: some glass tile and glass tile mosaics have small pinholes or crazing on the surface which may collect grout. Any grout will collect in these small surface pinholes, but a little extra time spent cleaning the surface while the grout cures will significantly reduce the amount of visible grout left on the surface. Also, a matching grout color will tend to be less noticeable on the tile surface than a contrasting grout color. |
 |
||
 |
||
|
||
|
||
|
||
|